Magic Note Pad
Contents
1 Home Screen
2 Power on/Off and restart
3 File Transfer
4 X-Paper mode switch
5 Stylus settings
6 Screenshot Editing & Screen Recording
7 Anti-accidental finger touch settings
8 Benefits Collection
 PDF
PDFThe home screen has a simple design, faster operation, and more personalized interface.
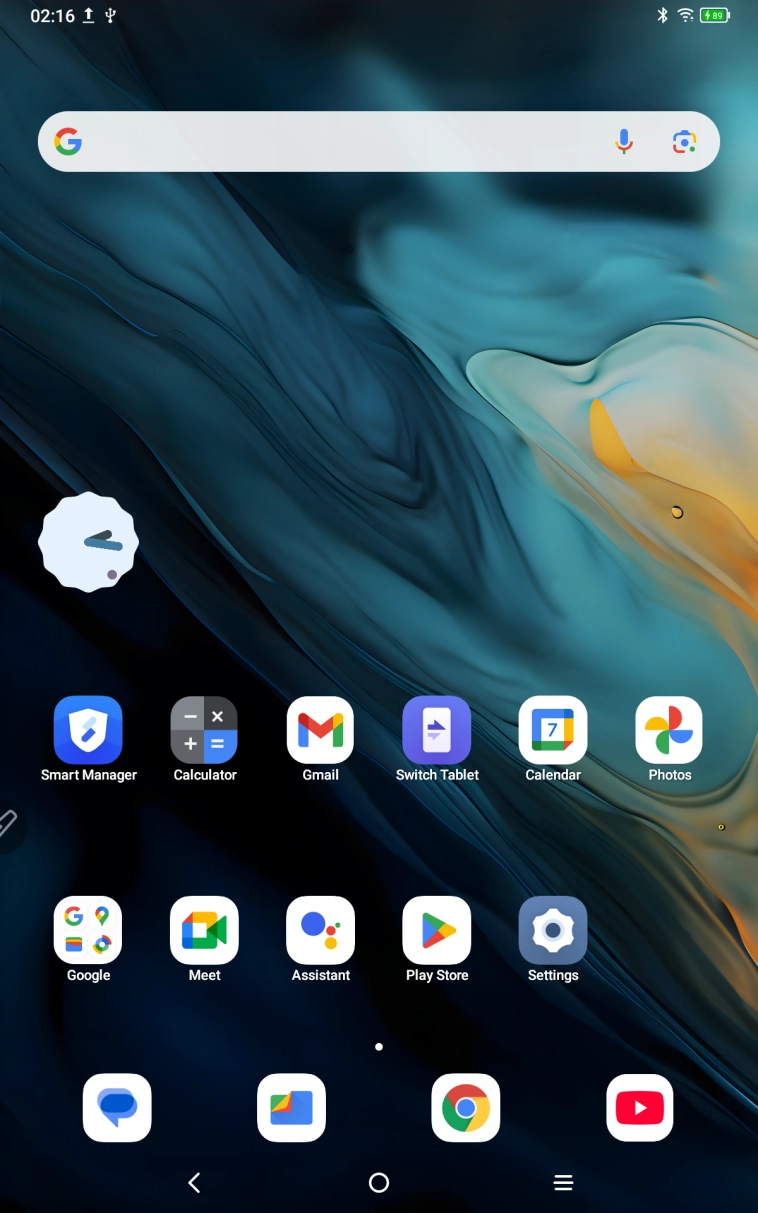
Top status bar: Check the drawing tablet status and notification messages.
Bottom favorites bar: Place frequently used apps, which you can remove or replace.
In addition to making home screen related settings (wallpaper, theme, widgets, etc.) in the settings, you can also tap and hold on a blank area of the home screen to enter the home screen settings interface, as shown below:


Power on
Press and hold the power button for about 5 seconds. When the XPPen startup screen appears, release the power button.
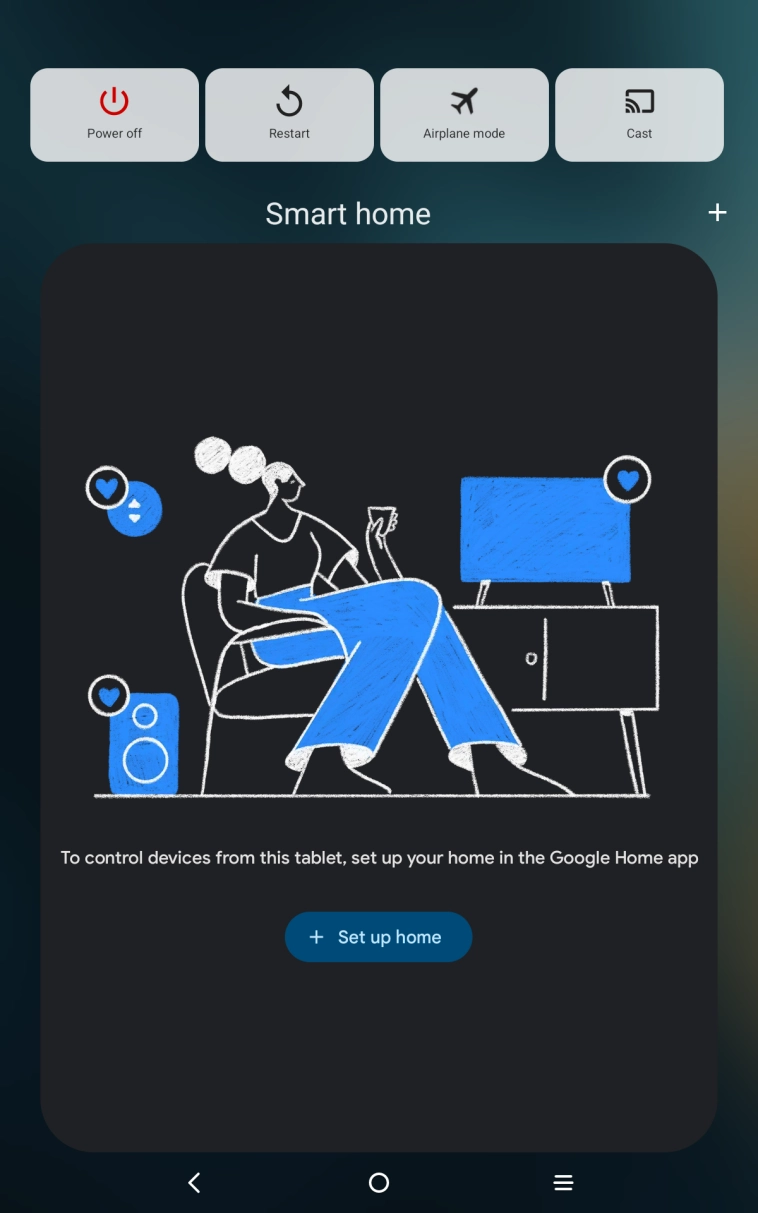
Power off or Restart
Press and hold the power button for about 2 seconds, a prompt page will appear (as shown below), select Power off or restart.
Note:
Restarting the tablet regularly can clean up the tablet's running cache and keep the tablet in good condition. If the tablet does not work properly, you can also try to solve the problem by restarting the tablet.
Force shutdown
If the tablet does not work properly and cannot be restored by restarting, you can try to press and hold the power button for more than 10 seconds to force a shutdown.
There are two ways to transfer or synchronize files between the tablet and PC.
3.1 Wired mode (USB2.0 OTG)
Here are the steps:
Step 1: Connect the tablet and PC via USB cable
Step 2: A pop-up window will appear on the tablet, prompting the user to select the usage method (transfer files or transfer pictures)

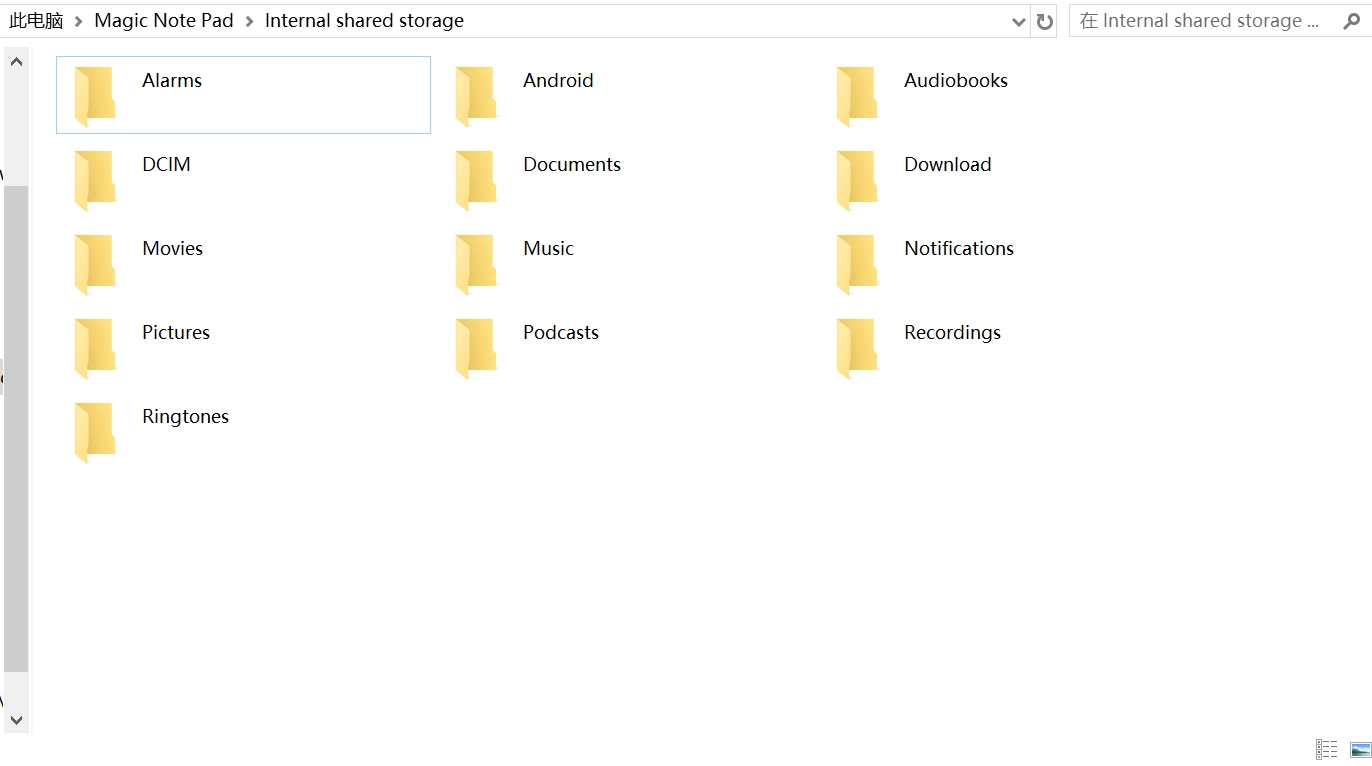
Step 3: Open the PC (Windows or Mac), and you will see the corresponding disk directory folder (as shown below).
Notice:
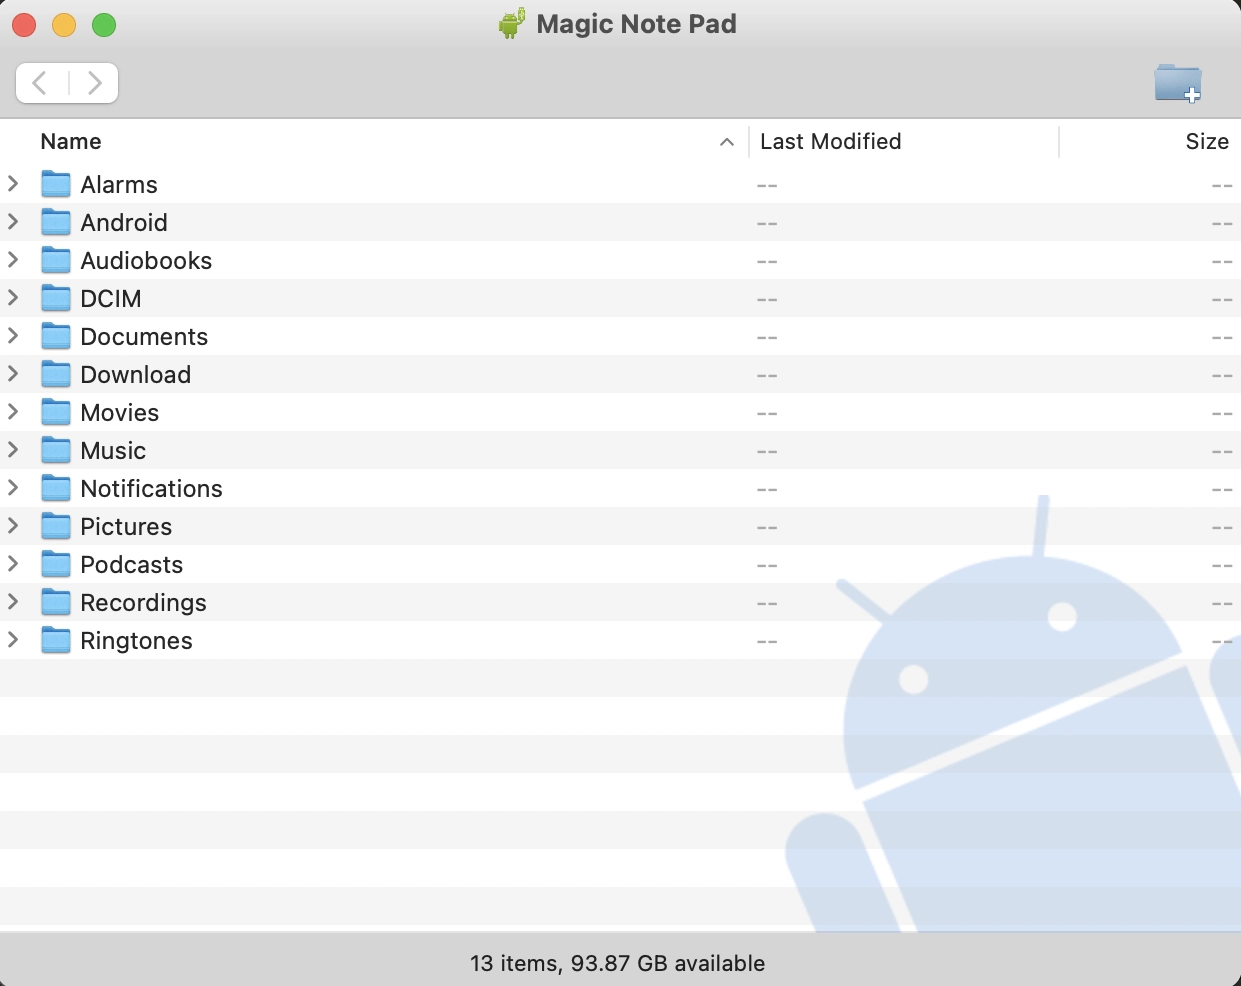
1. The Mac computer needs to install the Android File Transfer app first.
2. Computers running Windows XP may not be able to connect properly. Please download and install Windows Media Player 11 or above.
Windows system file directory diagram:
Mac OS system file directory diagram:
3.2 Bluetooth wireless mode
Compared with wired file synchronization, Bluetooth wireless is more convenient, but it currently only supports transmission between Android devices and Windows PCs, and does not support iOS and MacOS devices.
Use the following steps:
Step 1: Turn on the Bluetooth of the sending and receiving devices (using Windows PC as an example)
Find "Receive Files" in the Bluetooth options on the Windows PC and click to enter the "Receive Files" state
Step 3: Select the file you want to transfer on your tablet and choose “Bluetooth” to share, as shown below.
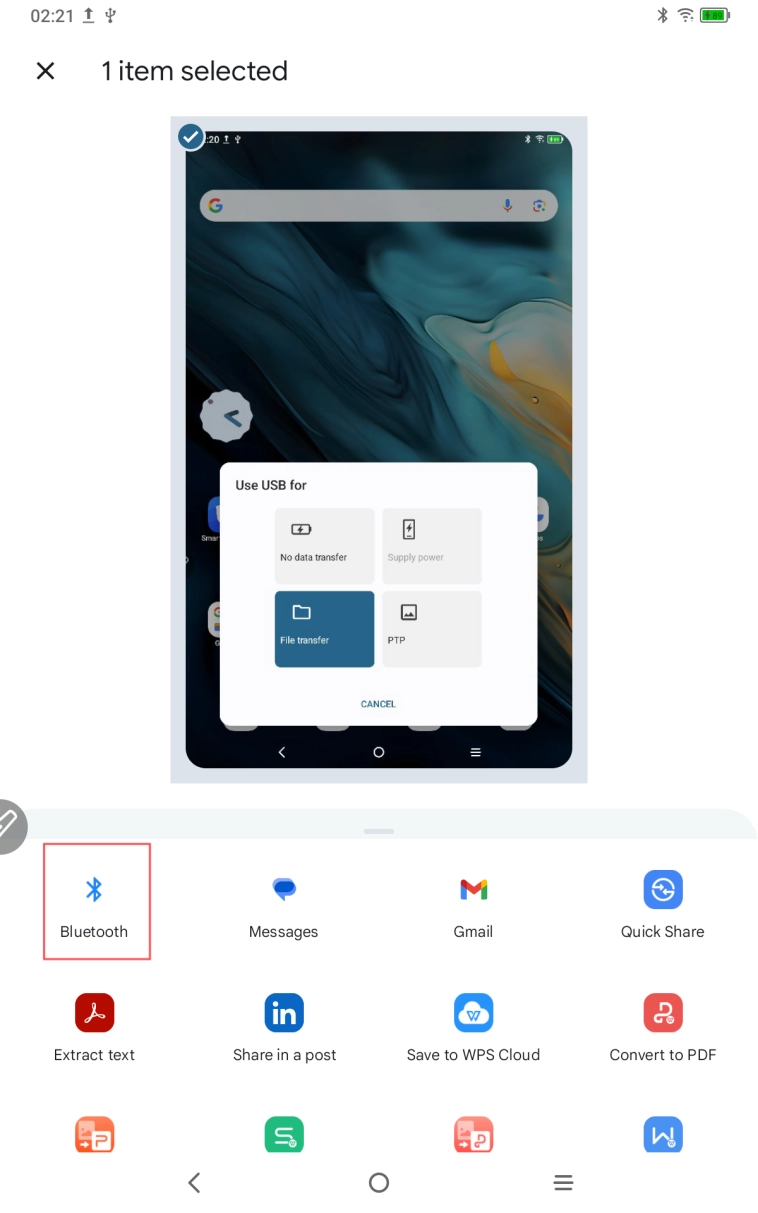
Step 4: Select the device to receive in the Bluetooth device list
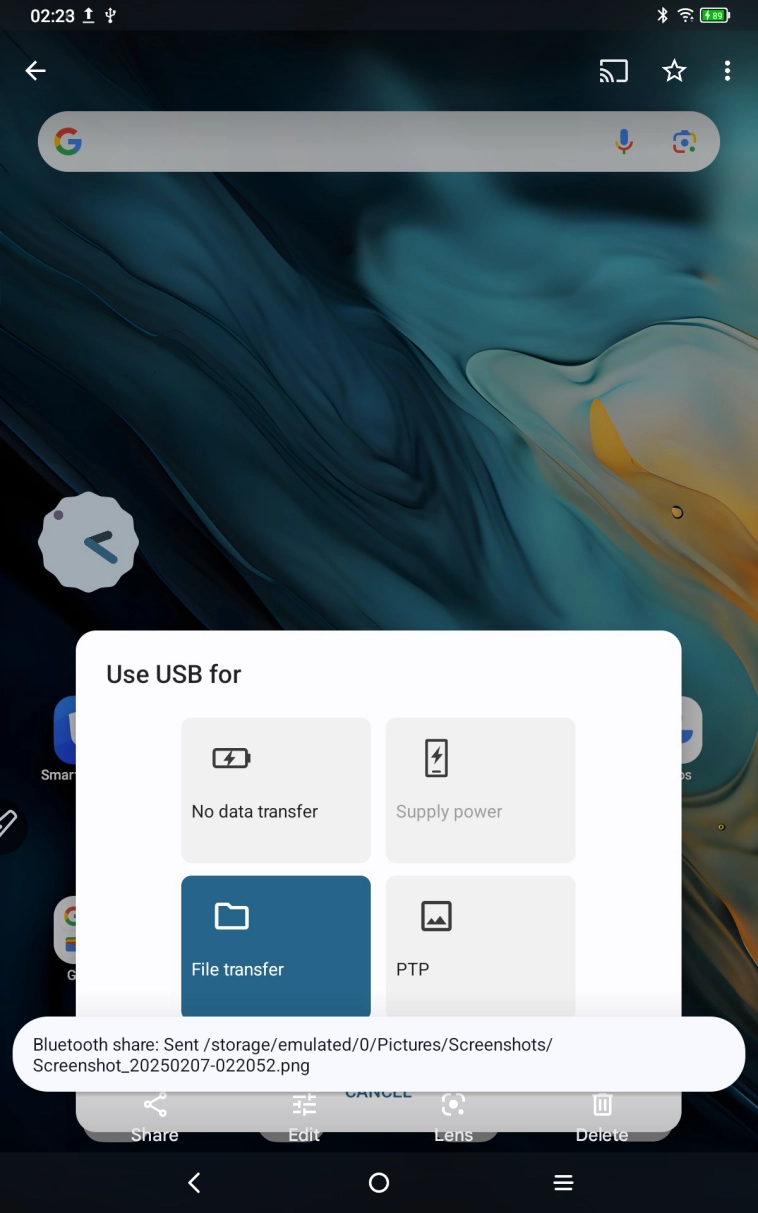
Step 5: The PC receives the file and selects a path to save it. The file transfer is completed, as shown below.
There are two ways to enter X-Paper:
Method 1:
The steps are as follows:
Step 1: Open Settings
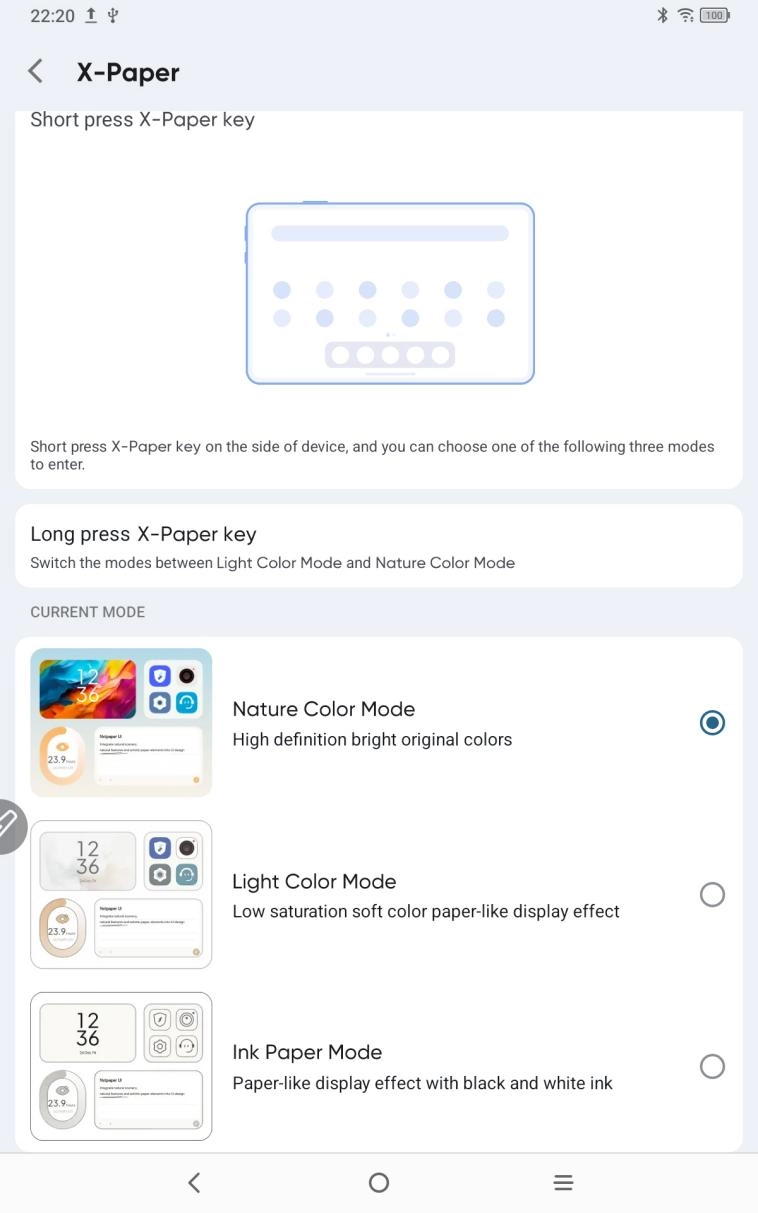
Step 2: Find the fifth option "X-Paper zone" as shown below:

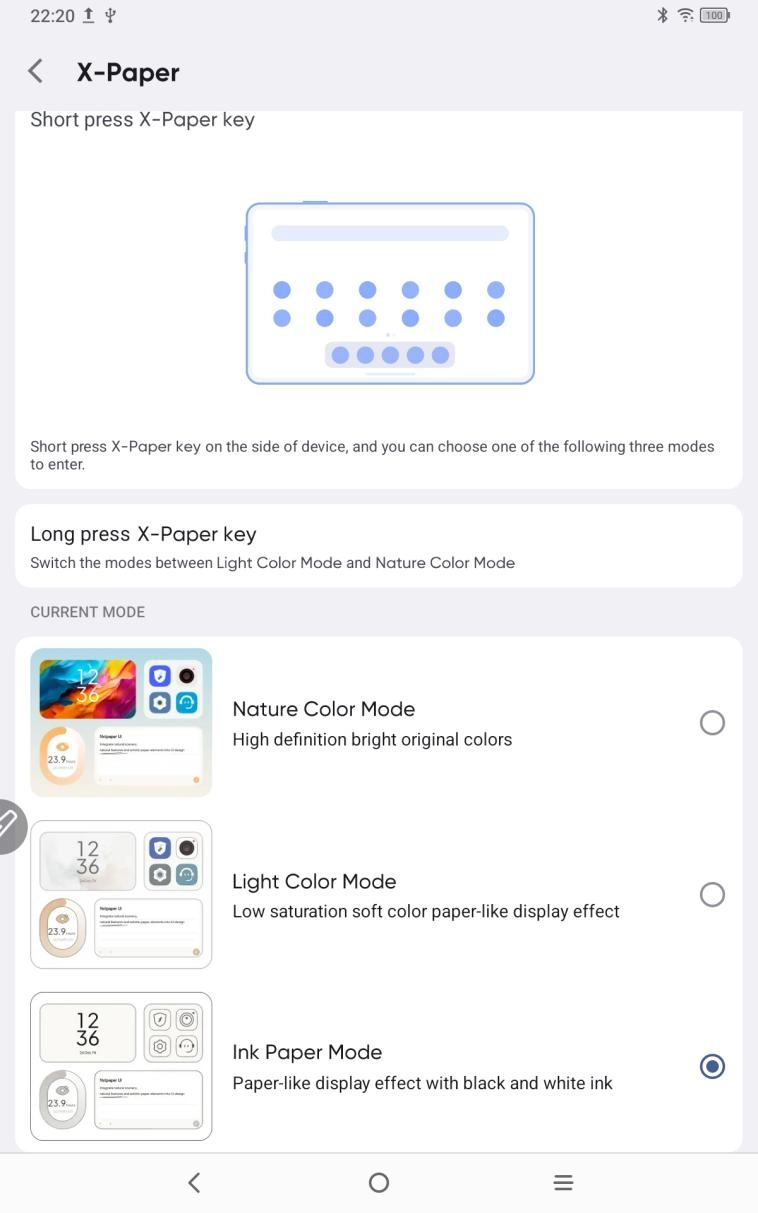
Step 3: There are three modes: "Nature Color Mode", "Light Color Mode" and "Ink Paper Mode" as shown in the figure below;

Method 2:
Long press the X-Paper key to enter, as shown below:

Note: You can switch between light color mode and true color mode by short pressing the X-Paper key
This tablet stylus is a passive pressure-sensitive pen that does not require power or Bluetooth pairing. You can start drawing as soon as you pick up the pen.
5.1 Stylus calibration
The steps are as follows:
Step 1: Open Settings
Step 2: Find the 11th option "Advanced Features" as shown below:
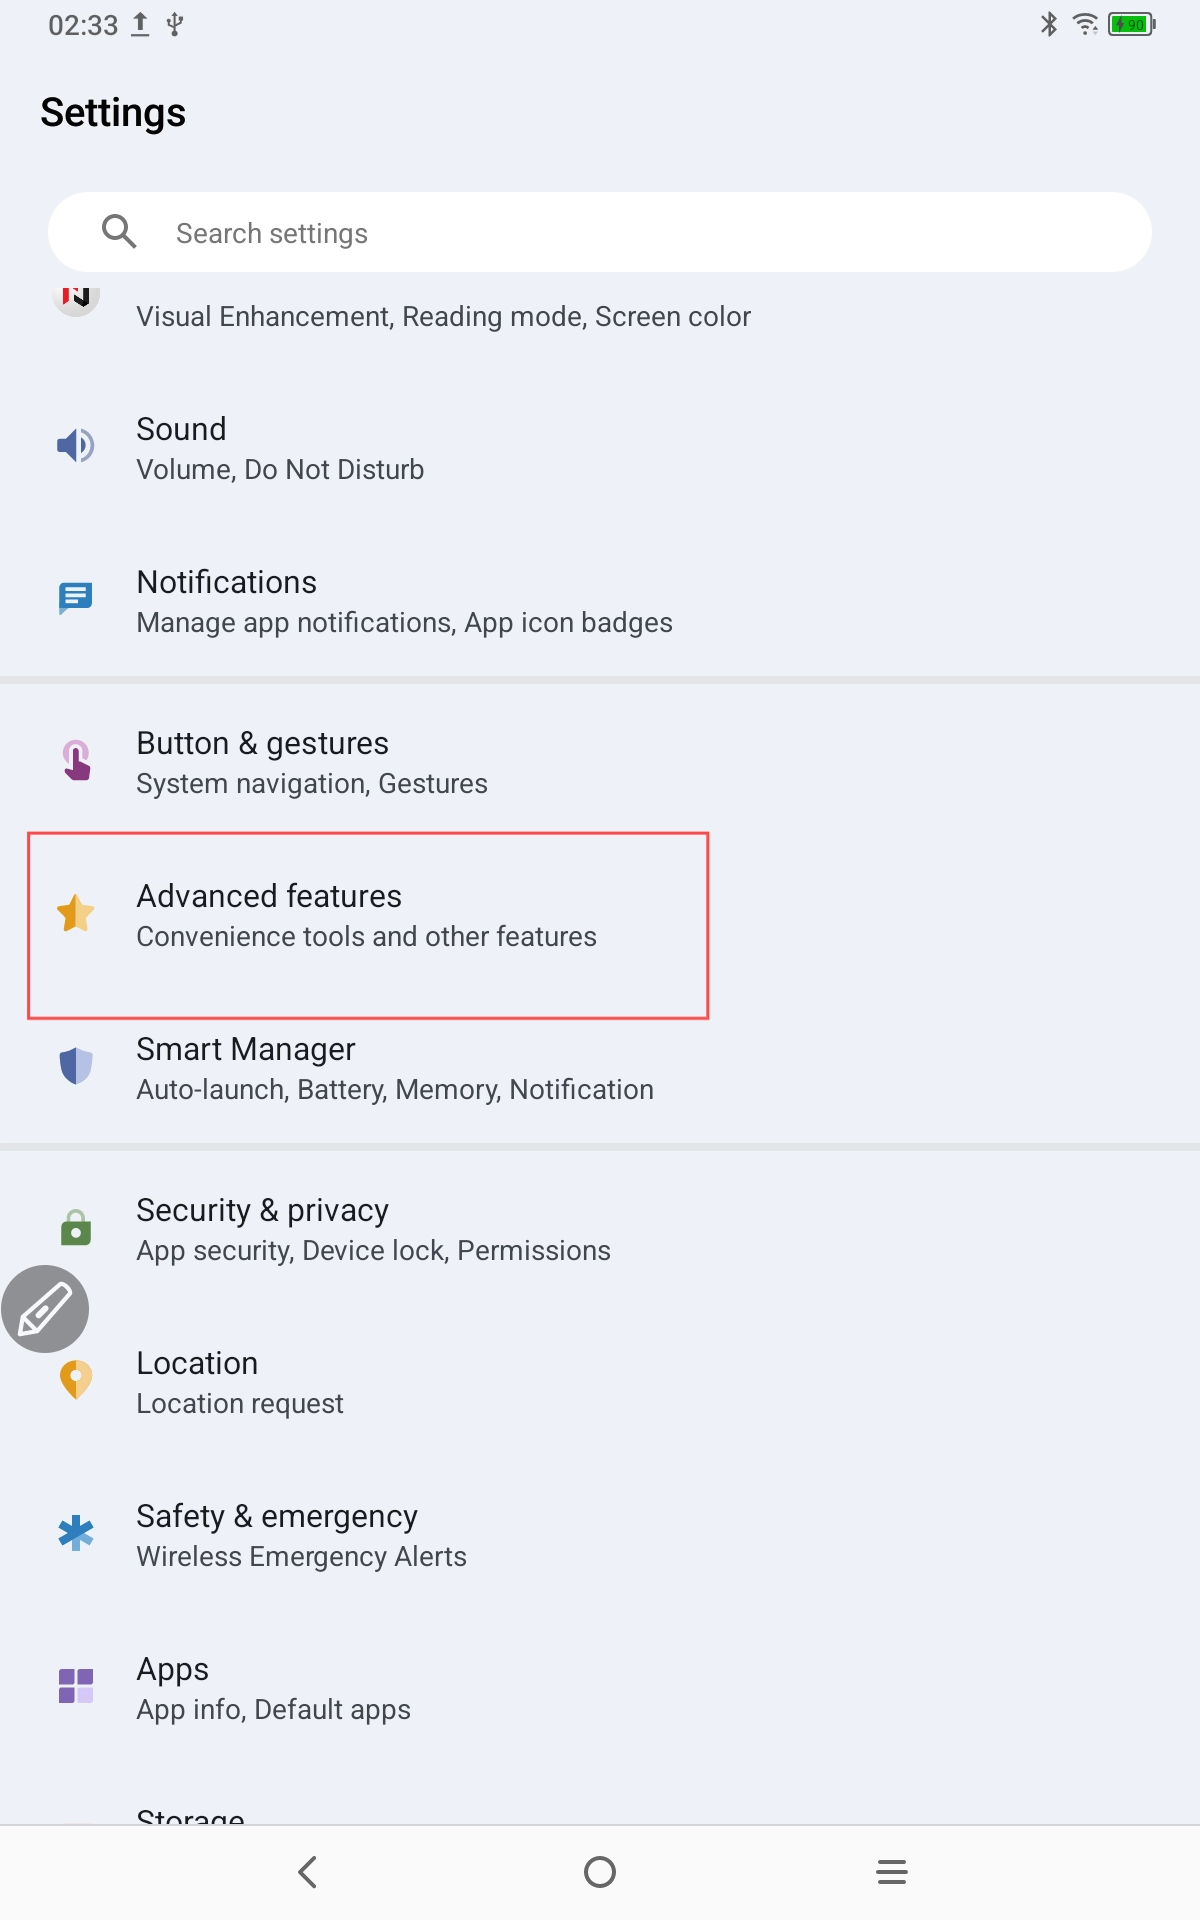
Step 3: Find the Handwriting offset
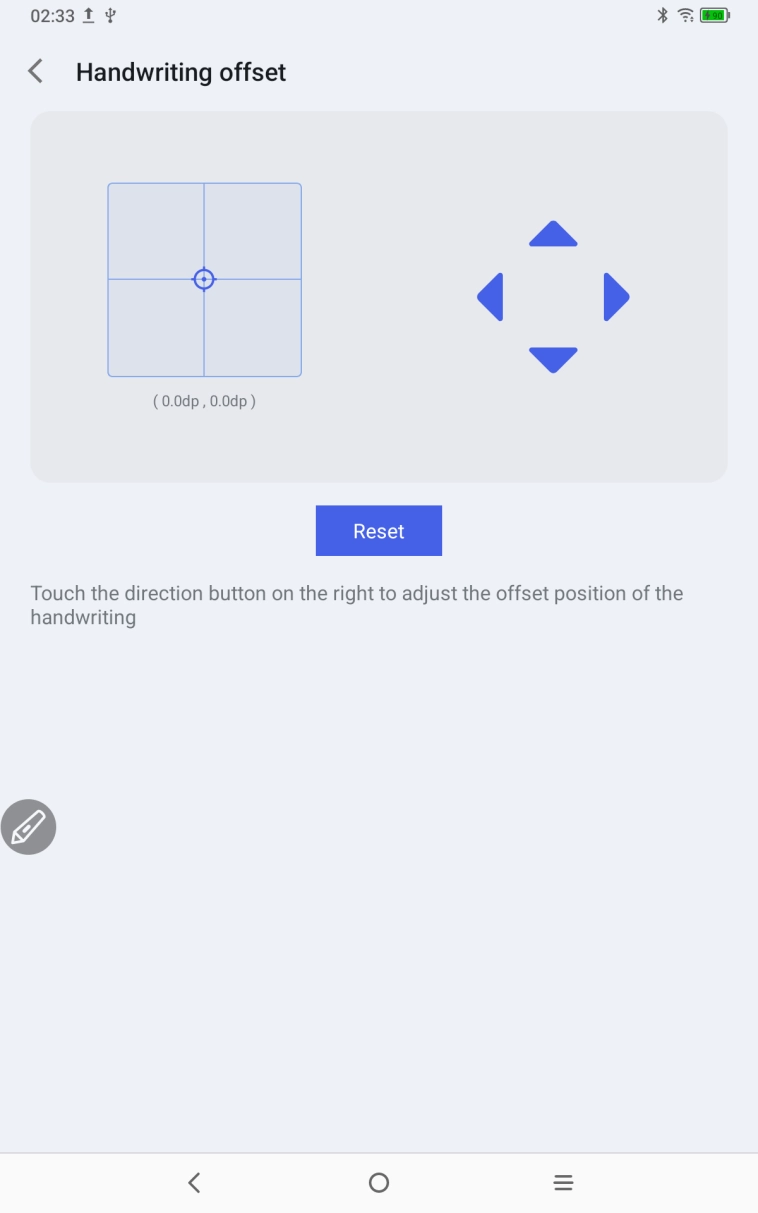
If there is a position offset between the pen tip and the actual pen landing point, you can turn on this function and click the direction key on the right to adjust the offset position of the note.
5.2 Button Customization
The steps are as follows:
Step 1: Open Settings
Step 2: Find the 11th option "Advanced Features"
Step 3: Find the stylus
Step 4: Find the Customize key function, as shown below:

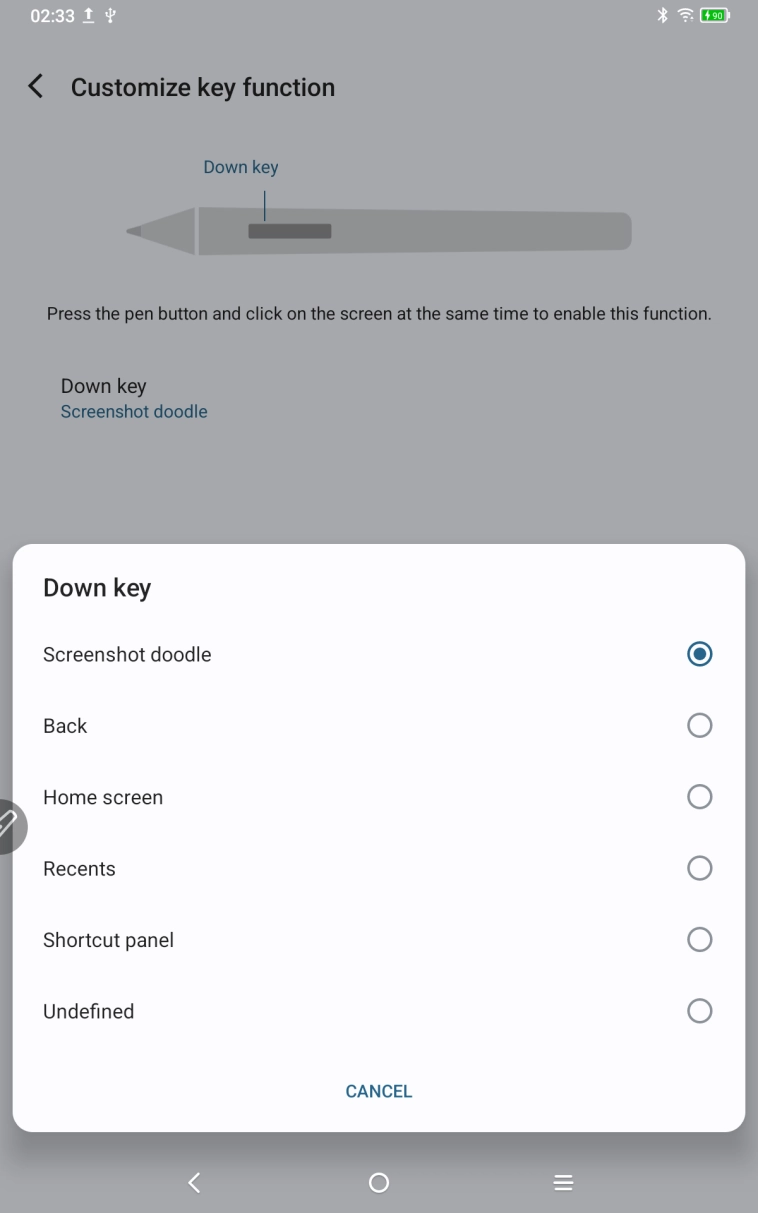
Step 5: Click on the Customize key function
NOTE: Use the pen buttons and tap on the screen simultaneously to enable this feature.
Click "Down Key", as shown in the figure below, users can define the pen button function by themselves.
6.1 Screenshot Editing
Screenshot editing allows users to quickly take screenshots of the current interface while using a tablet, and write and annotate on the screenshots. The steps are as follows
1. When the tablet is in the on-screen state (except the locked state)
2. Press and hold the stylus button and double-click the screen
The system will automatically open the screenshot editing function for users to use
6.2 Screen-off Notes
Screen-off Notes allows users to quickly start writing and annotating when the screen is off. The steps are as follows
1. When the tablet is in the screen-off standby mode
2. Press and hold the stylus button and double-click the screen
The system will automatically turn on the screen-off shorthand function for users to use.
In addition,users can also turn on/off this feature in Settings → Advanced Features → Screen-Off Notes

This tablet supports both hand touch and pen touch, and the system defaults to pen touch priority: that is, when the system detects that the stylus is working, finger touch does not respond.
In addition, we designed the switch to prevent accidental finger touches:
This switch is designed for handwriting scenarios. After disabling handwriting touch, you can focus on creation without worrying about any accidental touches. There are 2 operation paths:
1. Pull down the shortcut menu at the top and select the "Handwriting touch" switch;
2. To set, go to "Settings → Advanced Features → Handwriting Touch" option.
8.1 XPPen Notes Benefits Collection
The steps are as follows:
Step 1: Go to the desktop homepage or application drawer
Step 2: Find and open the XPPen Notes app
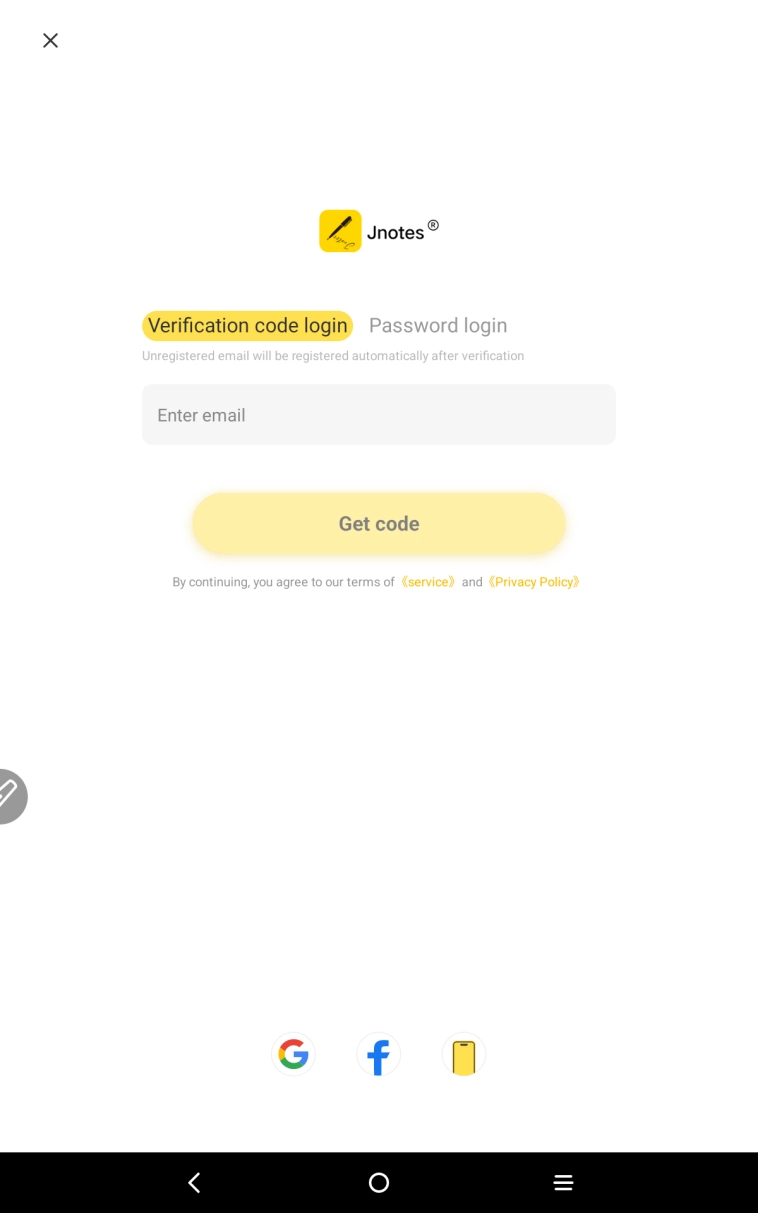
Step 3: When you start XPPen Notes for the first time, a pop-up window will appear asking you to get your membership. Click "Continue" as shown below:
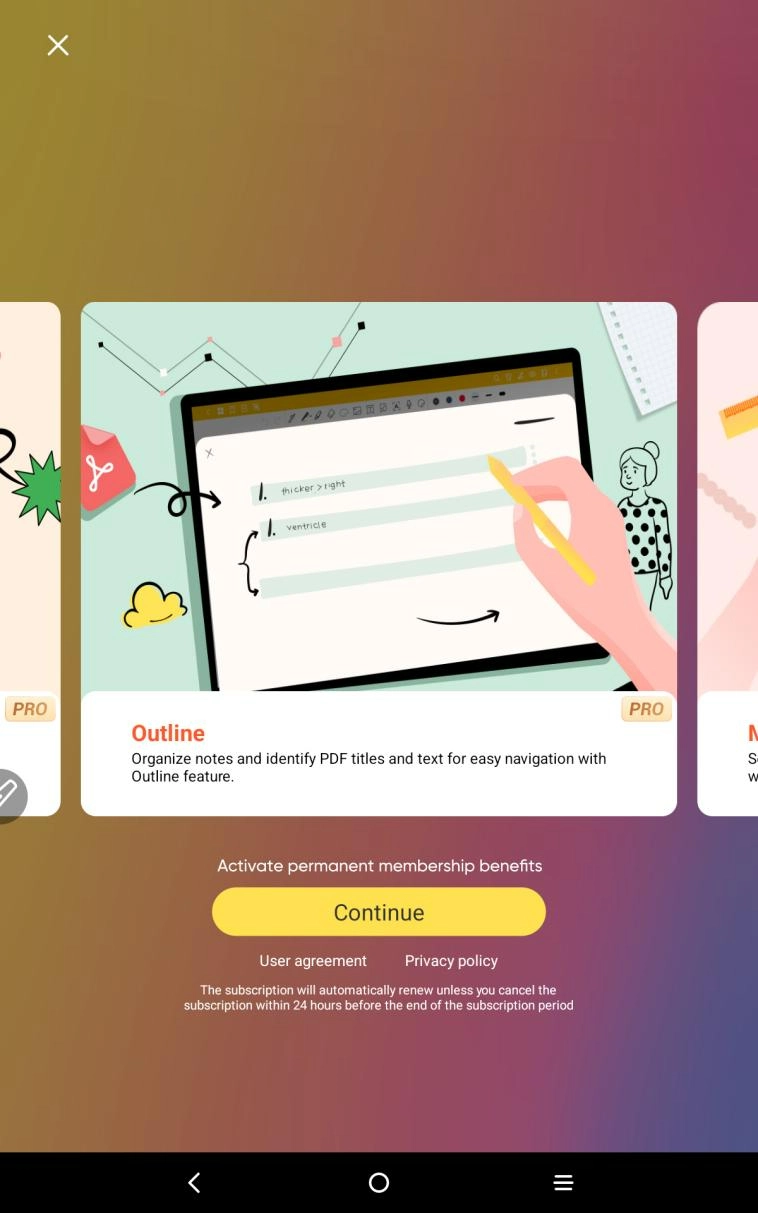
Step 4: After clicking "Continue", there are three ways to log in: mobile phone number, Facebook,and Google. Choose one to log in (note that the login input security verification needs to distinguish between uppercase and lowercase letters)
Step 5: After successful login, you can return to the member center to view member information without activating the membership.

8.2 WPS Benefits Collection
The steps are as follows:
Step 1: Go to the desktop homepage or application drawer
Step 2: Find and open the WPS app
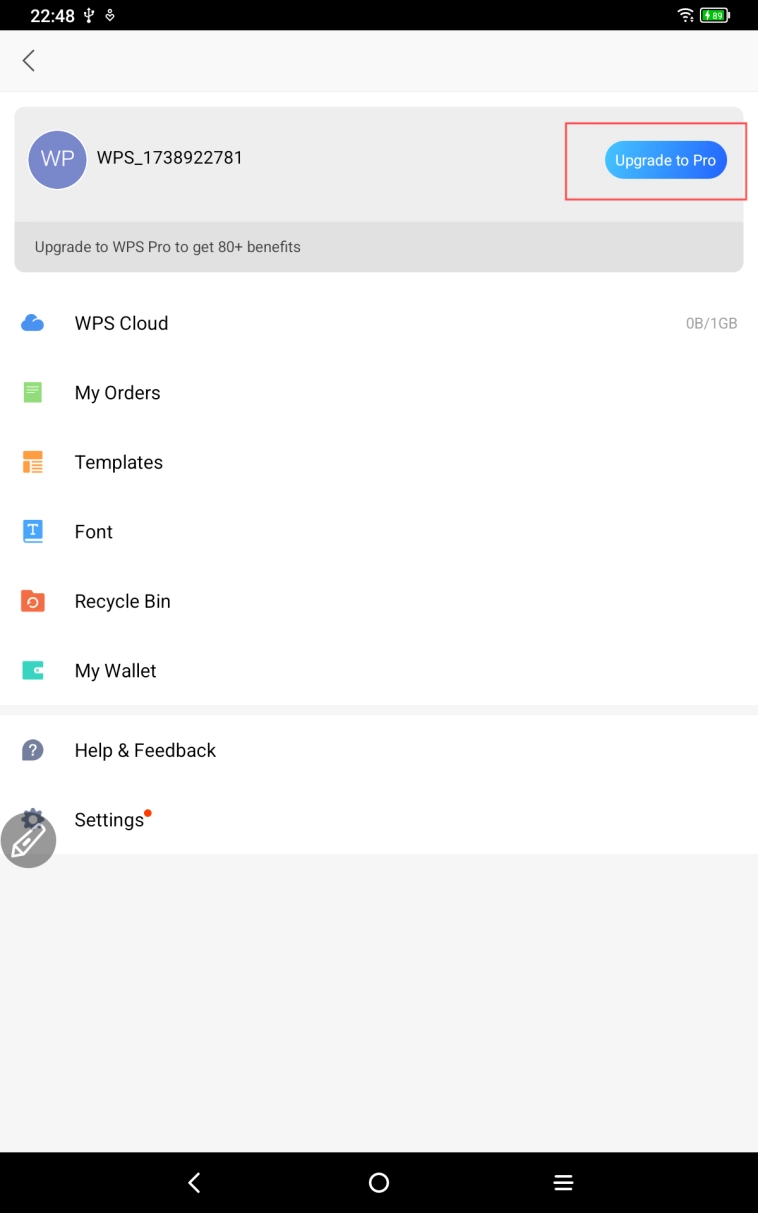
Step 3: Login account. If you don't have an account, please register and log in.


Step 4:Upgrade to WPS Pro membership

Step 5:Choose an annual subscription and see 30 day trial information. After successful subscription, start a 30 day membership trial

Attention: Users can cancel the renewal at any time during these 30 days, and there will be no charges after expiration. If not canceled, the fee will be deducted after 30 days.