Getting started with your
XPPen Artist Pro 19 (Gen 2)
Follow these steps to start creating on your
XPPen Artist Pro 19 (Gen 2).


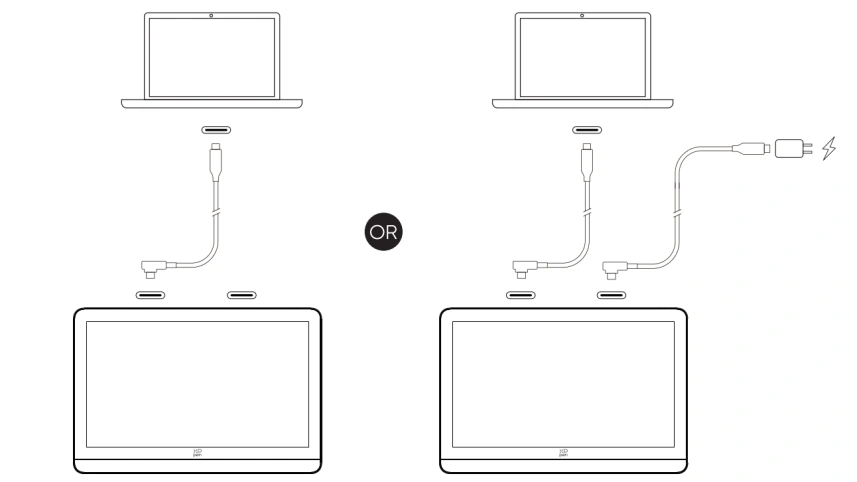
Connect drawing display to the computer via the USB-C to USB-C cable. If the drawing display does not light up, please connect the drawing display to the power adapter via another USB-C to USB-C cable.
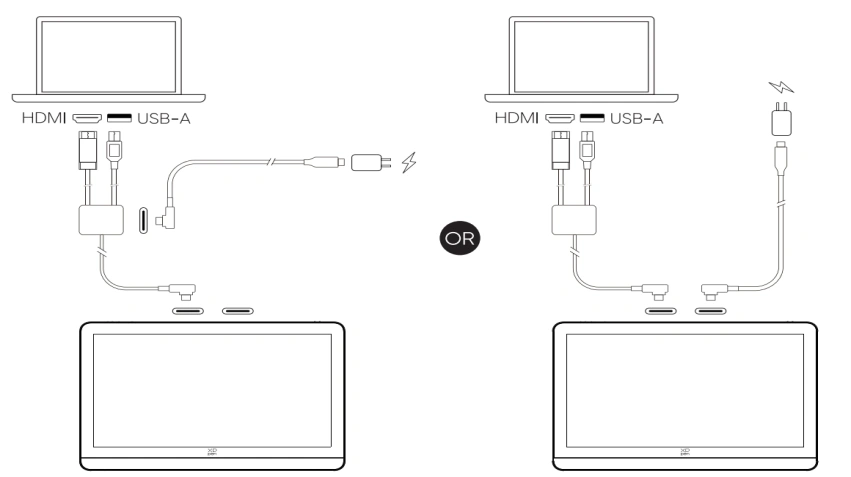
1. Connect to the computer via 3in1 cable
Use the 3in1 cable, connect the drawing display to the computer via the HDMI and the USB-A ports.
2. Connect to the power supply via USB-C to USB-C cable
Option 1:Use the USB-C to USB-C cable to connect the USB-C power port of the 3in1 cable and the PD power adapter.
Option 2:Use the USB-C to USB-C cable to connect the other USB-C port of the drawing display and the PD power adapter.
* If your computer has multiple HDMI/DP interfaces, please connect to the interface of the independent graphics card.
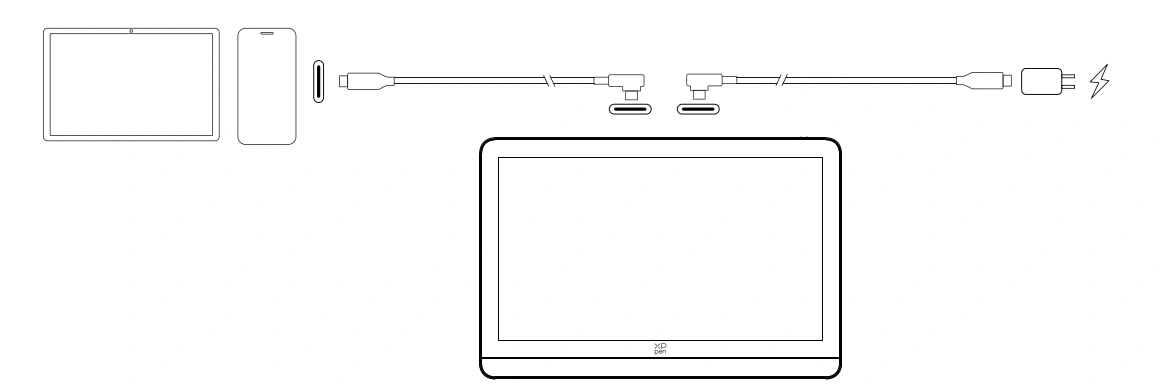
1. Connect the drawing display to your Android device directly via the USB-C to USB-C Cable.
2. Connect the drawing display to the power adapter via another USB-C to USB-C cable.
* Please check the XPPen official website for compatible Android phone/tablet models.
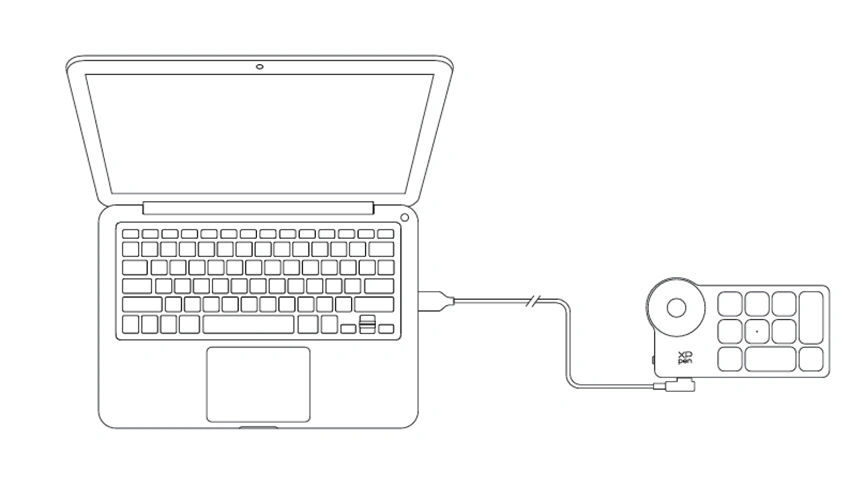
Connect Wireless Shortcut Remote to your Computer via USB-C to USB-A Cable.
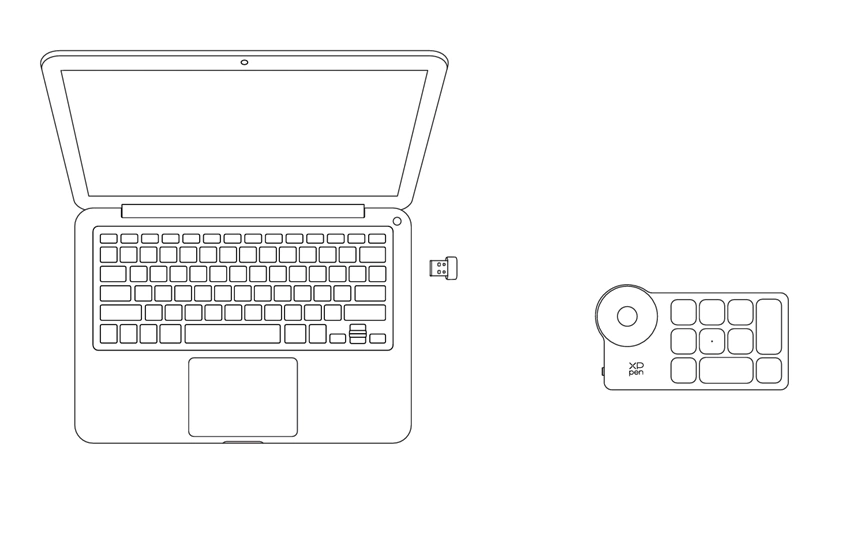
Plug the Bluetooth receiver into the computer and slide the power switch. The indicator light should always be blue. The blue indicator will be off after 30 seconds.
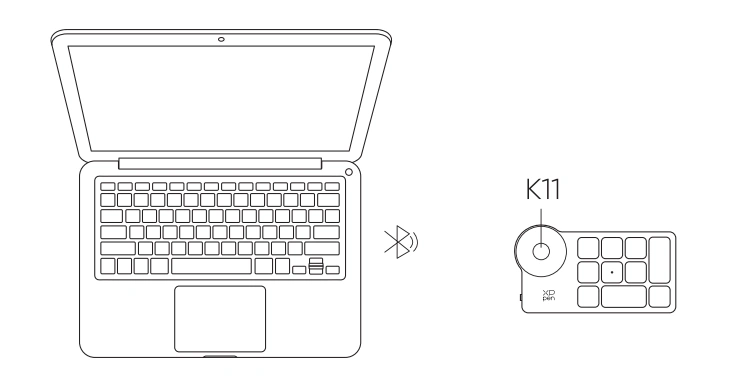
1. Slide the power switch and the blue indicator light flashes slowly. Then long press the K11 shortcut key for 6 seconds to enter Bluetooth pairing and the blue indicator light flashes quickly.
2. Turn on the Bluetooth on the computer, add Bluetooth device, search for Shortcut Remote and complete Bluetooth pairing by clicking the device name, with the blue indicator always on. The indicator will be off after 30 seconds.
3. Slide the power switch again to turn off.