Fox Drawing: How to Draw a Cartoon Fox with Simple Steps
ANIMALSToday I want to show you how to draw a cartoon fox by giving you some simple steps to follow along with.
Basic Supplies Needed for Today’s Tutorial
I like to do most of my artwork digitally. For today’s tutorial I am using the XPPen Artist Pro 24 (Gen 2) 4K and the art program Clip Studio Paint. You can use whatever tools you want for this basic line art style as long as you feel that you have good control over the lines and shapes that you are trying to make for your drawing.

Warmup Drawing Exercises to Try
Before jumping into a drawing it is always a good idea to warm up a bit. You can do tiny sketches or doodles to get your hand eye coordination going. I like to warm up with basic shapes or even a series of ovals. Especially for cartoon style drawings that tend to be more fluid and clean. Another key aspect of drawing cartoons is to practice making organic strokes. Start at one point and move your arm slowly and consistently across the page until you reach the end point. You can combine this with curves as shown below. Small ovals can be done with your wrist but long fluid curves are generally done by moving from the elbow or even from your shoulder. Just keep doodling until you find your comfort zone!
Here are a few examples to warm up with…

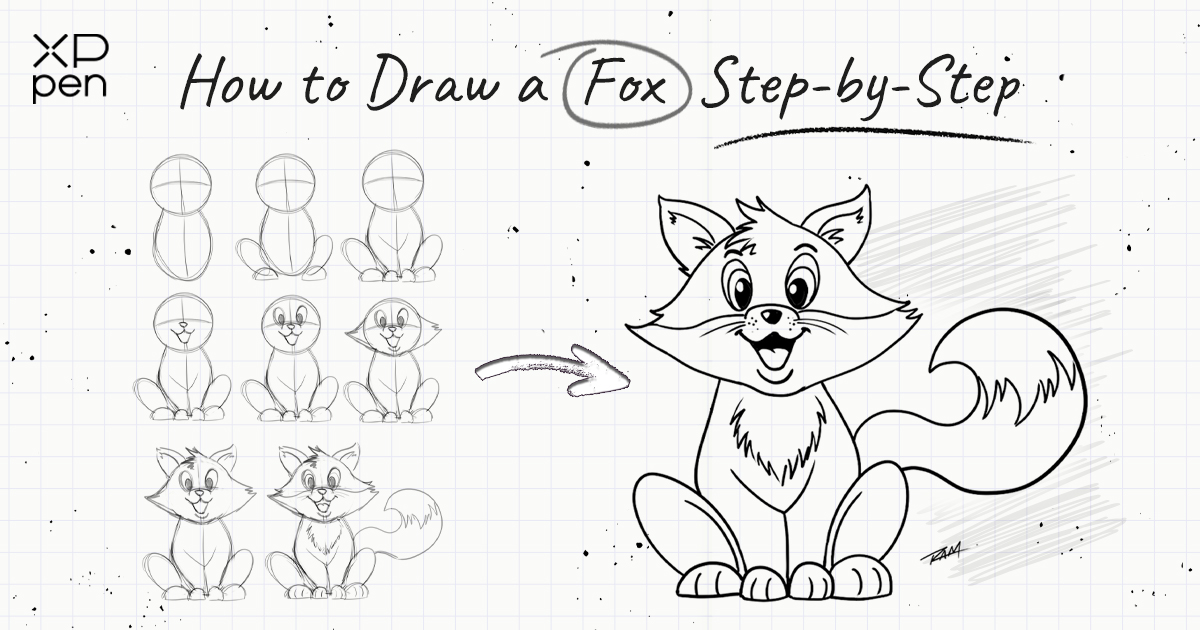
Drawing a Cartoon Fox Step by Step
Whenever we move into a new drawing, another good thing to think about is how the basic shapes will be evident within our illustration. You don’t have to use the same shapes that I use. Whichever shapes you see naturally will work just fine. The idea here is to simplify the drawing process in the beginning so that the details will be easier to add later on.
Here is a breakdown of how I see the character at the start of the design process…
As you can see from the illustration above the cartoon fox is made up of many ovals and a few triangles. Now let’s work through the step-by-step drawing and it should become more apparent.
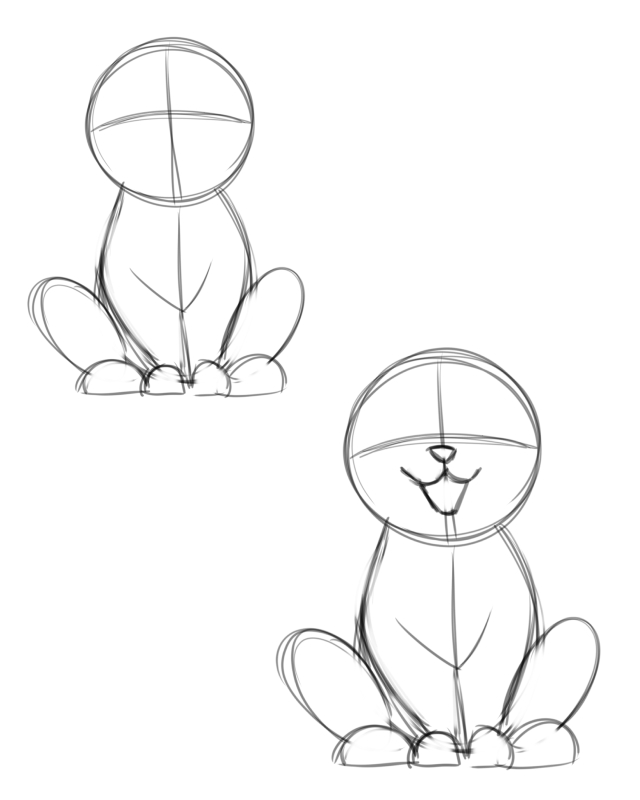
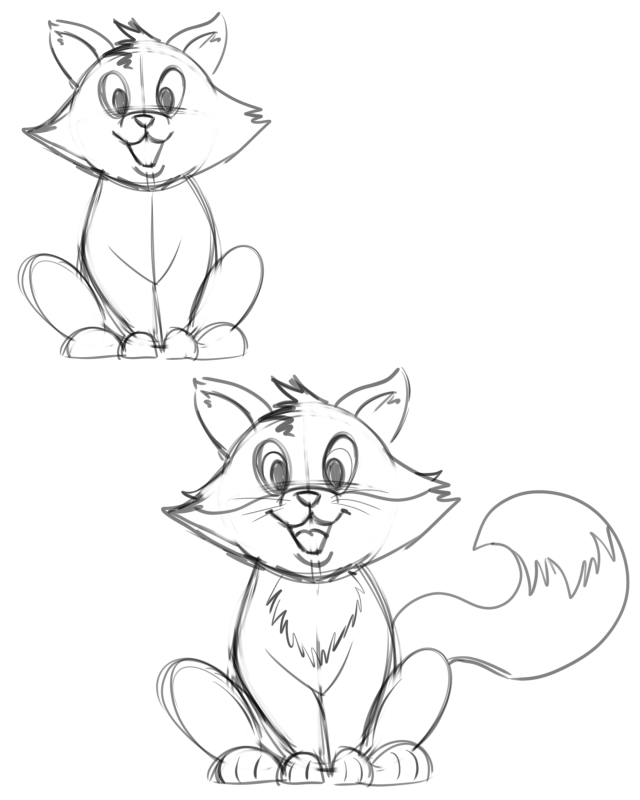
Step 1: Draw a circle for the head and an oval for the body. I will also draw a centerline or two to create a sense of form. These are called “Wrapping Lines” or “Cross Contour Lines.”
Step 2: Draw two more ovals for the lower legs and then add two more for the feet. As you can see I added a flat line across the bottom of the feet to show the character is sitting against a flat surface.

Step 3: Add two more ovals for the front two feet. Also add a “V” or triangular shape for the chest area.
Step 4: Now draw in the nose and mouth area. The nose is a small triangular shape, the upper mouth or snout is a “W” and the open mouth or lower lip is a “U” like shape.
Learning to relate these simple concepts to your drawings can make your life as an artist much easier!
Step 5: Draw 2 ovals for the eyes and two for the pupils. This area can be wildly different since we can get a ton of expression with the eyes, so experiment often!
Step 6 : Add the triangular shapes for the sides of the head. I also added a bit of zig zag to the tips to create the look of the fur.
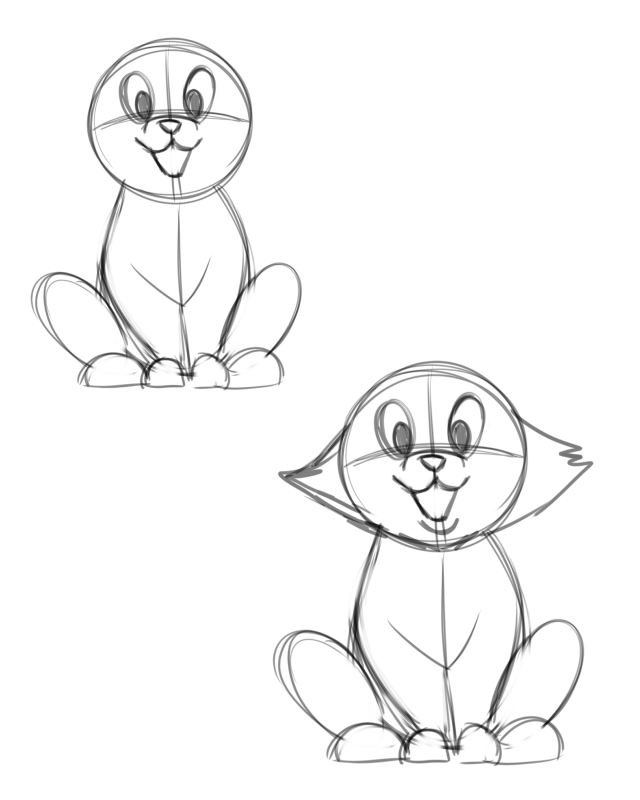
Step 7: Add the triangular shapes for the ears and then some more zig zag type lines for the hair on the top of the head. You can also use a few more zig zags to give the ears a bit of fur and make them appear more detailed.
Step 8 : Draw in the curve across the face to show the separation of the two areas. You can also draw in the fur on the chest area with a few more zig zags. Finally, draw in the tail. This is really just two “S” curves that taper at the end.
Angular Vs. Organic Lines and Shapes
Before we move to the final step, I want to give you another concept to consider when drawing your cartoon characters. All art styles use a combination of angular and organic lines and shapes but striking a balance with them will help you to find your style. For the most part, angles tend to convey a sense of danger, structure, or rigidness, while curves or organic versions are used for beauty, flow, and movement. If you feel that your characters are a bit too stiff and lifeless then they may just need a few more curves to make them look more expressive. So like anything else in art, experimenting with these concepts is key!
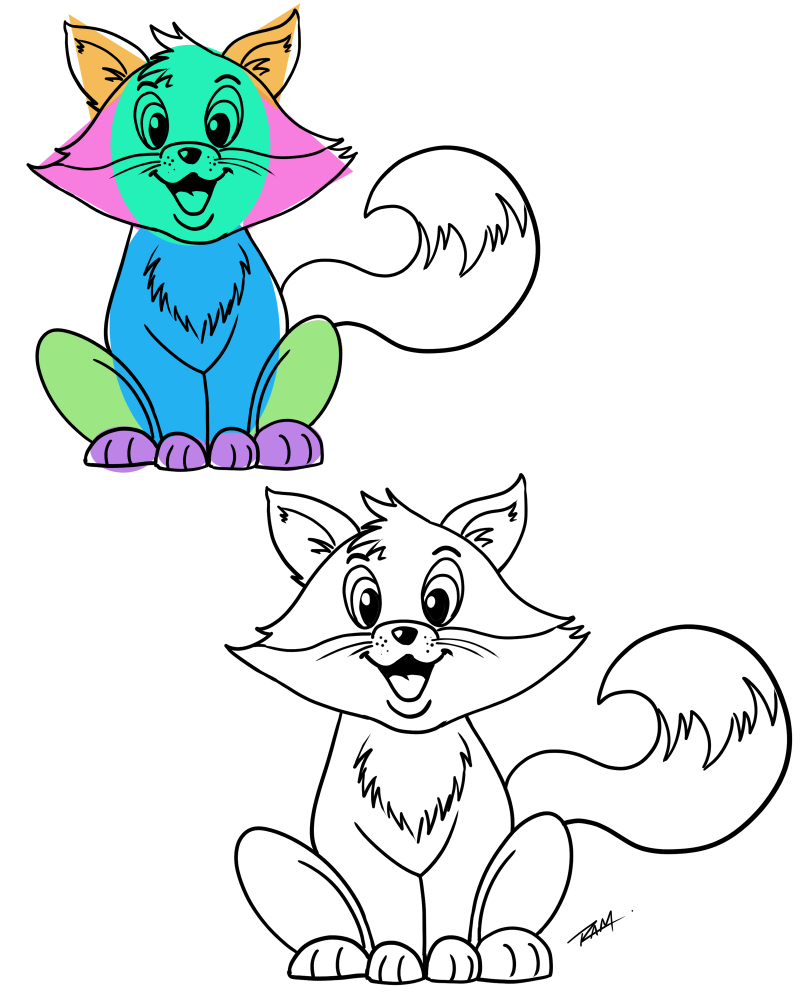
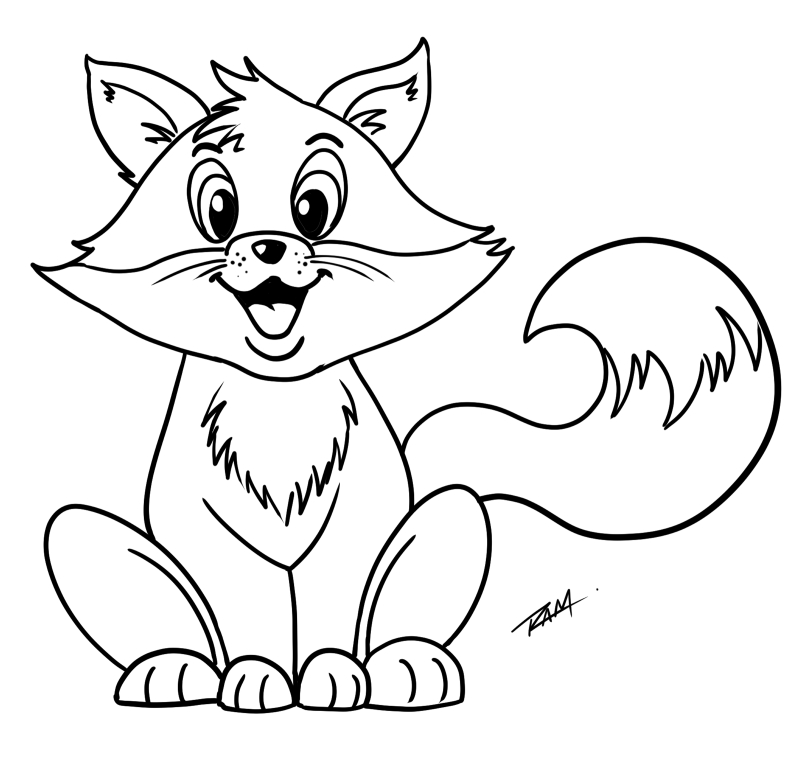
Step 9: Cleaning up the Line Work
Now with all the sketching and base forms in place we can clean up the artwork.
For all the curves, try to draw with a longer sweeping pass. Do your best to find a consistent
speed and slowly pull the line.
Sometimes it helps to overshoot the line and then erase back. ( If you are working digitally. )
If you are working traditionally, you can practice pulling the line over and over but without
actually touching the page. This helps us to imagine the process and build coordination before
drawing it in. I find that the angles and the zig zag lines are much easier to draw since we tend to pull those
from our wrist and it can be easier to control that motion.
Video Tutorial for Drawing a Cartoon-Style Fox
If you would like to watch a step-by-step narrated video on the drawing process you can watch it here…
Thanks for following along and I hope you learned a few things today to improve your drawings. Good luck with your art and bye for now! :)
If you want to see more drawing tutorials by Robert A. Marzullo, you can visit Ram Studios Comics.
About Us
Originated from 2005, XPPen is now one of the top brands under HANVON UGEE, integrated with digital drawing products, content and service as a globally notable digital brand of digital art innovation.
Learn moreRecommended Articles
OTHERS How to Draw Easy Optical Illusions Step by Step OTHERS How to Draw a Human Head with XPPen Drawing Tablet ANIMALS How to Draw a Monarch Butterfly Realistically: Step-by-Step Tutorial